Get More Customers, Keep Them Longer, and Grow Your OGV
Young Living Brand Partners: Pour yourself into what really matters. Streamline everything else using one simple solution of monthly content, software tools, training, and support in one place.
Everything you need to run your YL business, in one place.
Monthly Content Contact Manager Custom or Pre-Made Website Calendar Bookings Call Packages Online & Offline Events Your Own Private Communities & Learning Centers Email & Texting Zoom Payments Lead Generation Video, Audio, File Hosting Team Leader Tools An App AI Writer Tool Optional Store and so much more Plus, World Class Personalized Support and Free Live Training. ▶ Demo
GetGrowing Rank Accelerator Workshop
Stuck at Star? Stalled at Silver? Paused at Platinum? We've got your ticket to GROW. Learn the ONE thing every top earner has done to succeed, & what you can do to repeat their success & RANK ADVANCE! Designed exclusively for Young Living Brand Partners.
What GetOiling's Customers Say

Jodie Meschuk
Royal Crown Diamond

Heidi Hovan
Diamond
Jill Young
Royal Crown Diamond
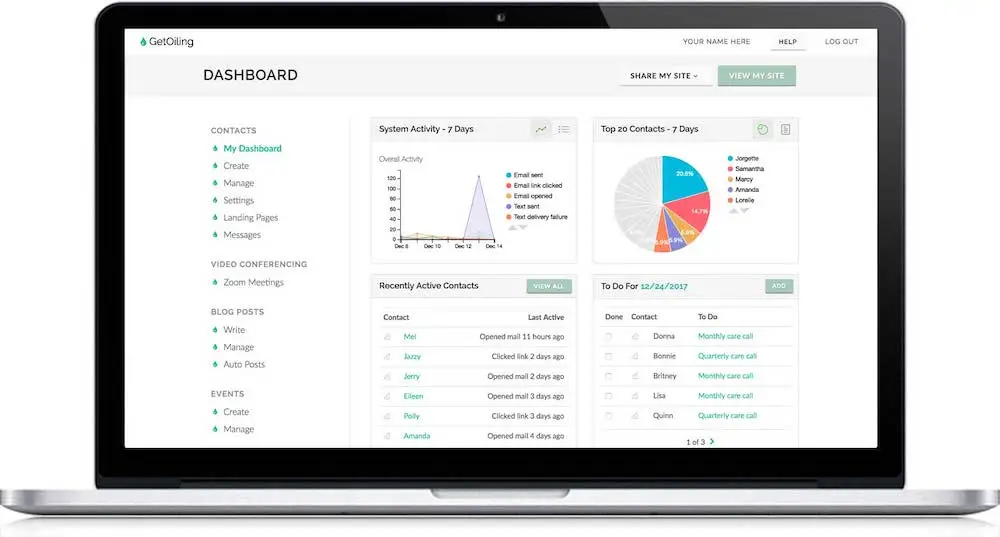
Never Miss Another Follow-Up
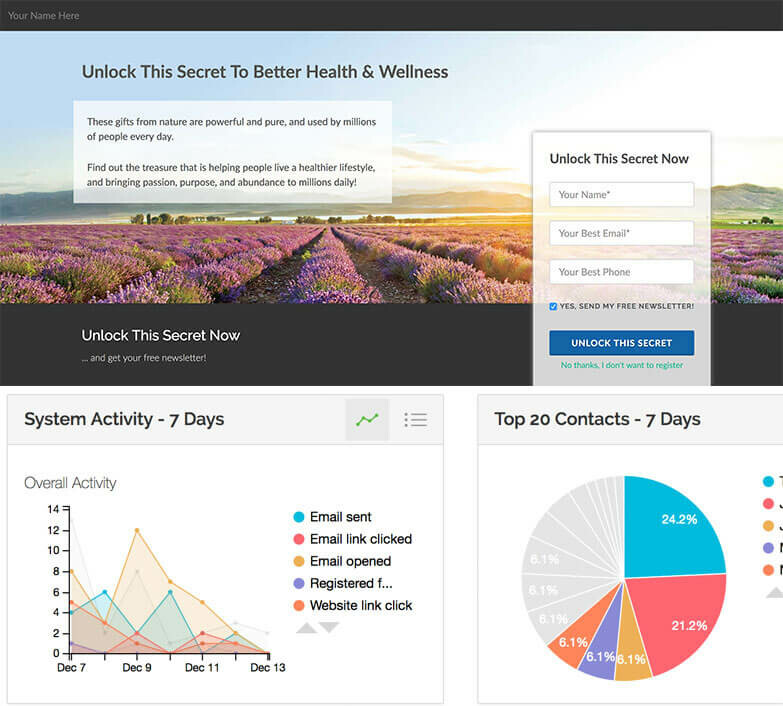
Stay organized with our world-class contact manager, built just for YL Brand Partners like you where a personal touch is key to growing your business. Tag people to organize and create lists of contacts, set reminders for yourself to follow up. Capture leads with landing pages, automatically follow up with emails and texts, let people sign up for what they are interested. Know who visits and when so you can follow up. Use pre-built landing pages or make your own. Track prospects and members, and easily bring in your team from the Young Living virtual office.
Replaces


“GetOiling is a full CRM website for my personal brand, not just a fancy YL sign-up link. I am so much more organized now and my OGV is way higher now that I remember to follow up with people.”
Sara C - Executive - USA
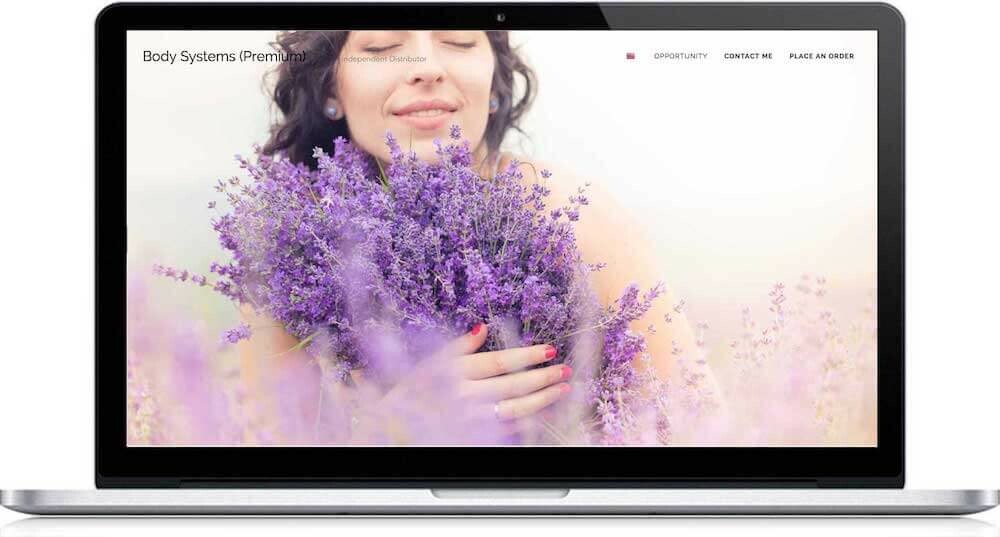
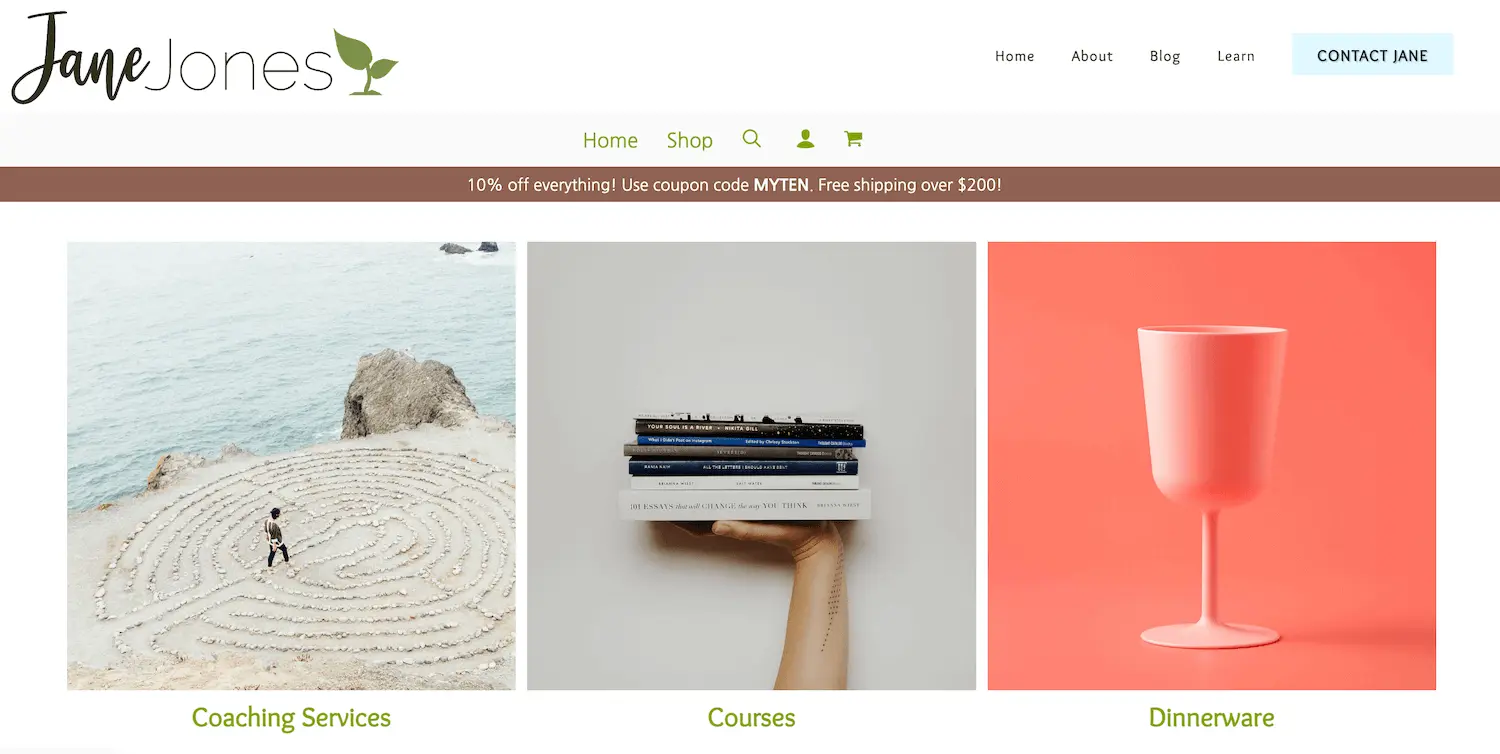
Your Website Puts You Front and Center
Your personal brand is powerful. Use a pre-built website theme, like Healthy Homes or Body Systems, and personalize with your story, photos, videos, and links. Or, build a completely custom personal website for your Young Living business to show all of what you do. Pre-built websites for Young Living brand partners include USA, Canada, Australia, Singapore, and more.
Replaces


“First off I love the easiness of it all. I love that it auto updates and there are videos and product links to go back to the corporate website. That people can sign up through this as well. I love that I can change it up every month if I want because I don't want the same website all the time... Overall I am extremely satisfied. And I have already had one person go to the website and book an appointment with me to discuss oils. And she found it very informative. Thanks again for an amazing product. ”
Casey - Star - Florida, USA
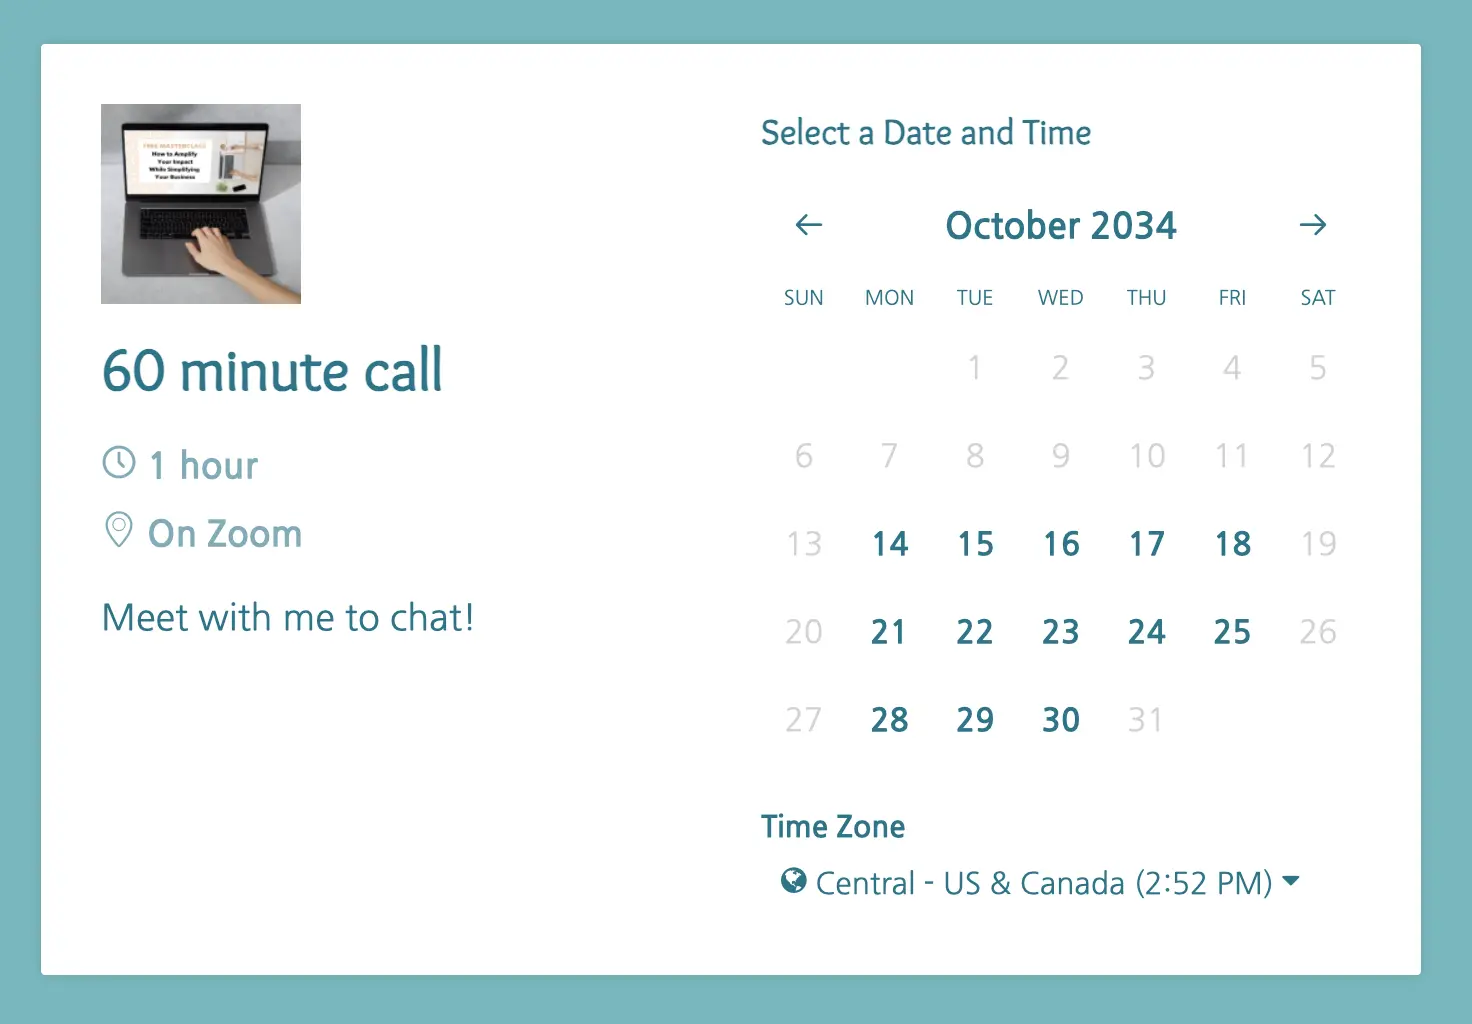
Allow People To Book With You, And Offer Call Packages
Let clients book time with you with the built-in booking calendar. Sell call packages and let GetOiling track the number of calls used. See all your meetings for the day at once, and easily reschedule or cancel them. Allow only certain contacts to use specific booking links, for those who are participating in a program or course. Connect with Google or Microsoft calendars so your availability is always up-to-date. Clients get email and text reminders of upcoming meetings and see and manage their call packages inside their member area. Works seamlessly with the built-in Zoom.
Replaces
![]()

“I am in love with this system as a whole!”
Jen M - Silver

Get More People To Your YL Classes
Collect RSVPs for Zoom classes, home parties, calls, conferences, and webinars right on your website. Track attendees, and send email and text invites and reminders. Create to-do tasks for the event, and even collect payments for your event.
Replaces


“I used to have really low attendance at my Young Living events due to lack of promotion. Now I don't even have to think about promotion and follow up to events because the system does it automatically for me. I am having more conversations with the same amount of time.”
Jill P - Senior Star - Arkansas, USA
Build A Community
Create your own private community right on your own website, complete with an app, without the pitfalls and distractions of social networks. Share your resources, chat in your discussion rooms, and educate with your online classes. Take payments for products and services. Create a safe social hub right on your website without the stress and distraction of social media, and watch your YL community thrive.
Replaces


“Since starting to use GetOiling, my leaders and I have created much more team momentum.”
Jacque M - Platinum - USA


Attract The Right People
Let your personal brand on your website and your own blog posts help your Young Living personal website attract leads with your own search engine optimized (SEO) site. Visitors can comment on and share your blog posts. Prefer to leave the writing to others? Automatically show posts from your favorite blog on your site.

“I keep getting YL leads from my GetOiling blog from articles I published years ago. Thank you for such a great tool!”
Colin M - Silver - Canada
Reach Out Effortlessly
Use the AI Writer to create emails, texts, newsletters, and more in seconds. Review and edit the content, then send it to your team.
Replaces

![]()

“I used to have separate programs for my texting, emails, events, zooms, and content, but with GetOiling I am able to have them all in ONE space! They just flow so well together and it makes working my business, as a busy mom of three so much simpler! I am so grateful for this resource. I wish I would have started using it years ago!”
Amanda D - Platinum - USA


Done-For-You Partner Content
Writing messages and designing graphics for your Young Living business takes so much time and effort. Let the pros do that for you with content that goes right into your GetOiling account. Our content partners have gorgeous content, templates and tools to help you engage, share, educate and duplicate easily.
Use Proven Business Growth Activities

“Here's what I know. I don't focus on income producing activities (IPAs). Regardless of my success to date, using the Coach shows changes my focus. I understand that the reason my business has not grown and been stagnant for 2 years is that I have been busy with so many things that don't bring me growth. Having the coach in my face daily is definitely starting to change the way I am thinking about my business. I can't tell you how much I appreciate this feature. Honestly, it's a game changer. Thank you!”
Stacey V - Gold - USA

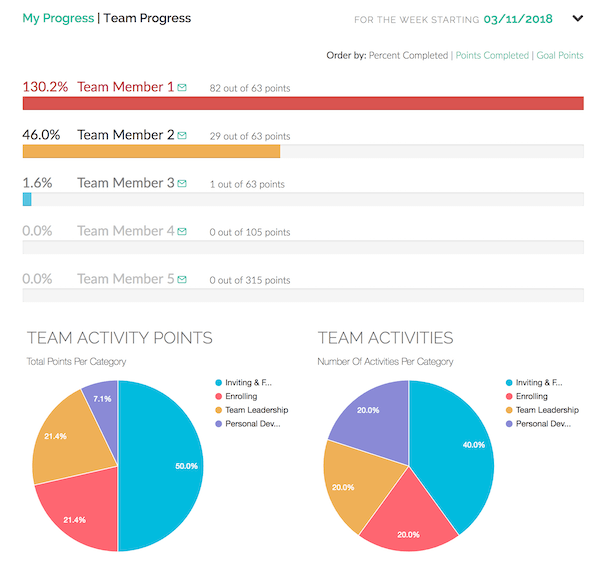
Be A More Effective Leader
Free up your time while your team grows more quickly with your own team leadership tools. Give funnels, campaigns, web pages, and more to your builders so they can have a head start on their business. See weekly coaching goals for each of your team members in one report, making it easy to see who is taking the most action. Easily duplicable for your team leaders!

“I'm a Young Living Gold, and I've used GetOiling to streamline my team's process, move our groups off Facebook, and allow my leaders to have resources at their fingertips that they don't have to search through.”
Jessica D - Gold - USA
Young Living Business Training
Not sure where to start? Reach out to our responsive Support team, ask questions in our Facebook group, or watch or read in our business training library. Join our free live Weekly Work Session training calls as well to get personalized advice. Every new GetOiling account includes our free Destined for Diamond training to get you started in the right direction, too.
“I used to have separate programs for my texting, emails, events, Zooms, and content, but with GetOiling I have them all in ONE space! They just flow so well together and it makes working my business, as a busy mom of 3 so much simpler!”
Amanda S - Executive - USA


Your YL Business, On The Go
Your new GetOiling back office and website works great on all your devices, whether you use the app or the website. Send email newsletters or text campaigns, update your to-do list, see who's visiting, and more from wherever you are.

“I used to spend a lot of time gathering my email list and making a monthly email. With GetOiling, I get it done in less than 30 minutes. And I do both English and Spanish. I love that I can tag my customers accordingly.”
Marinés H - Senior Star - USA
Build Stronger Relationships
Built-in Zoom video conferencing software lets you build closer relationships from wherever you are. Meet with your team and prospects face-to-face online, or hold online events with no meeting length limits. Talk to more people in less time and with no travel.
Includes


“GetOiling replaces 2 of my paid subscriptions and gives me an amazingly beautiful website. My Dashboard makes it easy to follow up with people. All my business needs in one place - Zoom, follow ups, emails, member profiles, events, website, blog, and more. I love GetOiling!”
Robin C - Silver - USA


Boost New Builders On Your YL Team
Add to the excitement for a new brand partner by giving a special link to your website with their member number. This leg builder link gets them online quickly and at no cost to them. Our referral program gives them half off one month, plus you get a reward, too.

“GetOiling is a one stop communication spot. Whether I need to zoom with my Brand Partners, send a mass email, AND I LOVE that I can set up a campaign at the beginning of the month and it continues to work without any effort on my part.”
Lauren H - Platinum - USA
Sell With Optional E-Commerce
If you would like to sell products and services with a more traditional e-commerce experience where shoppers can select products, change quantities, add them to a cart, and check out, and you fulfill products yourself, then the optional GetOiling Store feature may be for you. This add-on allows you to host a storefront with collections, products, coupons, shipping, tax calculation, and more.
Replaces
![]()

“I'm so impressed with not only the product you provide but the amount and level of teaching and support is incredible. I'm really excited!”
Allison M - USA

Don't Go It Alone
Rest easy knowing we've got your back. GetOiling's world-class support is with you every step of the way. Want someone to do the work for you? Inquire about our concierge website design and build services, virtual assistant services, and business strategy services. From making a website that matches you and your brand, to running your marketing, setting up funnels, strategizing your next business move, and more, we've got you covered.

“I cannot believe it's been a year! I could not have done this much in a year on my own without the help of the GetOiling team. Thank you!”
Renée A - Senior Star - USA
Safely Share Your GetOiling Back Office
Allow assistants, guest bloggers, video conference hosts, etc. to access your GetOiling back office with their own account. Know what they did with what contacts, blog posts, events, etc. Available on the Premium and higher plans for an additional per-user fee.

“I love that I can create a separate account for my virtual assistant to log into my GetOiling account. It's one less thing to worry about.”
Allison L - Gold - USA


Educate & Grow Your YL Team
Share your knowledge in your member area by setting up online classes. Track people's progress, require and approve homework, and more. Optionally connect your Stripe account and sell your classes, too.
“I love the GetOiling members area to have resources at my customer's fingertips. I was not doing well with systems and making sure everyone had all the resources. Now I can send everyone to the same place.”
Susan P - Gold - USA
What More Leaders Say About GetOiling

Jacque McLaughlin
Platinum
Robin Chenault
Silver
April & Charles Mier
Diamond
GetGrowing Rank Accelerator Workshop
Stuck at Star? Stalled at Silver? Paused at Platinum? We've got your ticket to GROW. Learn the ONE thing every top earner has done to succeed, & what you can do to repeat their success & RANK ADVANCE! Designed exclusively for Young Living Brand Partners.