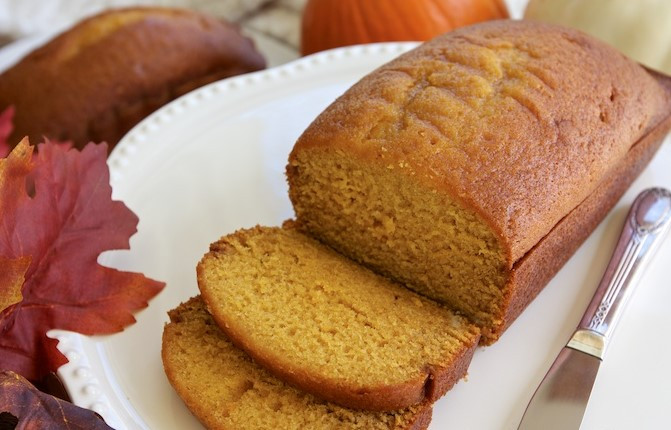
Pumpkin Bread with Vitality E.O.

It’s so so good y’all. Trust me. You’ll love it! And it’s definitely a good thing I’ve been working out regularly again because it’s just addicting. There’s your warning.


Best Pumpkin Bread Recipe (With a Twist!)Recipe 
Type: Bread/Dessert
Author: Decorchick
Cook time: Total time:
Best Pumpkin Bread Recipe with or without essential oils
Ingredients:
  • 3 C Sugar
  • 1 C Vegetable Oil
  • 4 Eggs
  • 3 1/3 C Flour
  • 2 tsp Baking Soda
  • 1 1/2 tsp Salt
  • 1 tsp Cinnamon
  • 1 tsp Nutmeg
  • 2/3 C Water
  • 1 15oz Can of Pumpkin (not pumpkin pie filling)
  • Optional Alternative with Essential Oils instead of the spices:
  • 6 drops of Nutmeg Vitality Essential Oil
  • 2 drops of Cinnamon Bark Vitality Essential Oil
  • 1-2 drops of Orange Vitality Essential Oil
  • 1 drop of Clove Vitality Essential Oil (clove is optional)
Instructions
  1. Beat sugar, oil, and eggs together.
  2. Beat in flour (1 cup at a time), baking soda, salt, cinnamon and nutmeg.
  3. Stir in water and pumpkin (don’t use a mixer for this part, it will splatter and mixture will look a little watery when finished.
  4. *if you are using vitality essential oils instead of spices, add your drops in after you stir the water and pumpkin together, then stir again to mix well
  5. Bake in 3 greased loaf pans, 350 degrees for 1 hour, or until toothpick inserted comes out clean.
  6. Let stand in pans for 10-15 minutes then remove and transfer to wire racks to cool.
  7. Let them cool completely before you wrap them up or store.
  8. They do freeze well.
And you can always add more or less of the oils if you prefer. Just taste test the batter beforehand and add what you like. The batter is quite delicious too. :)

Lemon Crinkle Cookies

Lemon Crinkle Cookies
These cookies are light and packed full of lemon flavor.   Thank you Lemon Vitality!   I would definitely recommend this recipe to anyone who likes lemon flavored goodies.  You will LOVE these little treasures.  They are simple to make, but the taste would lead to you believe otherwise! 

Ingredients:
2 C. Flour
2 tsp Baking Powder
1/2 tsp Salt
10 TBSP Softened Butter
1 C. + TBSP Sugar
1 LG Egg Yolk
1 LG Egg
8-12 Drops Lemon Young Living Vitality Oil
2 TBSP Milk
1/2 C. Powdered Sugar

Directions:
Heat oven to 350.  Mix all ingredients until well combined.  Shape into 1 1/2 inch balls.  Roll in powdered sugar.  Place on cookie sheet 2 inches apart. Bake 10-11 minutes. Remove before edges get brown.  Cool 5 minutes before moving to bakers rack to cool.

Roast Chicken with Lemon and Thyme

Vitality oils, chicken, and lemon make a perfect combination! This roast chicken is a total crowd pleaser and wonderful as leftovers for yummy, healthy lunches.

This delicious recipe includes this Oregano Vitality, Lemon Vitality and Thyme Vitality. Remember that when cooking with Vitality essential oils, because of their potency, we recommend using only 1-2 drops at first, or even the toothpick method: Stick a toothpick through the oil dropper to absorb the oil, then swirl the toothpick through wet ingredients. Give it a taste, and gradually add more flavor to your liking.
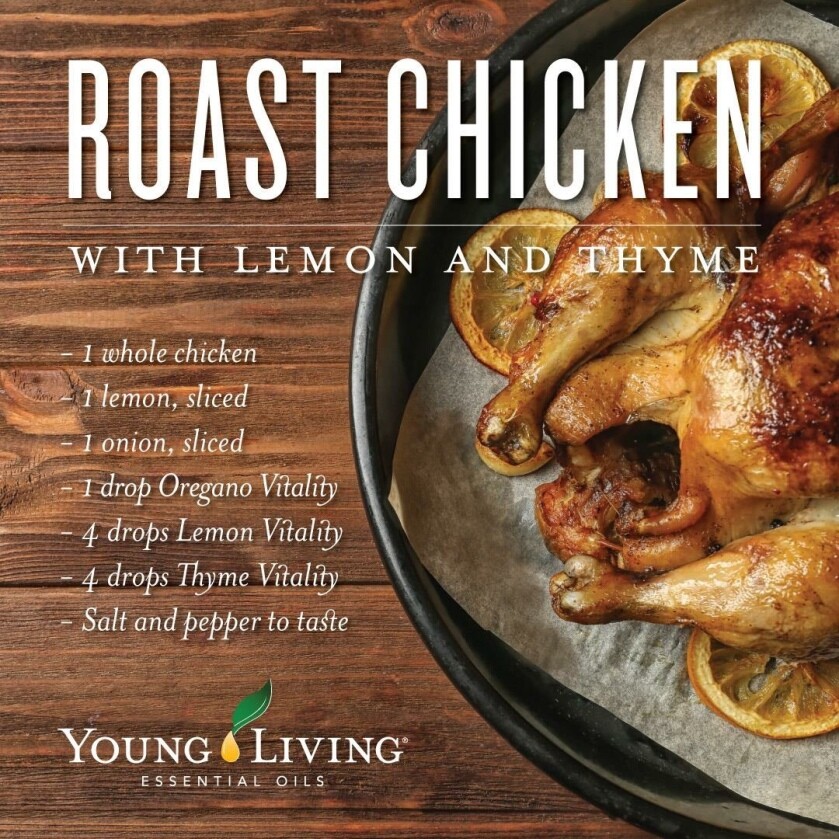
Ingredients:

  • 1 whole chicken
  • 1 lemon, sliced
  • 1 onion, sliced
  • 1 drop Oregano Vitality
  • 1 drop Lemon Vitality
  • 1 drop Thyme Vitality
  • Salt and pepper to taste
  • ½ cup organic butter or ghee

Instructions:

1. Preheat your oven to 450 degrees.

2. Rinse your chicken with cold water inside and out, and dry well with paper towels.

3. Place lemon and onion slices in the bottom of an oven-safe skillet or roasting pan and in the cavity of the chicken.

4. Mix the Oregano Vitality, Lemon Vitality, Thyme Vitality, and butter together with the salt and pepper in a small bowl.

5. Rub half of your oil mix under the skin of the breast side and back side. Rub the remaining mix on the outside of your chicken. Using some kitchen twine, tie up the chicken legs and wings. This makes for more uniform cooking.

6. Place your chicken breast-side-up in the pan. Place in your preheated oven, and immediately reduce the heat to 375 degrees.

7. Roast your chicken for approximately 20 minutes per pound, or until the temperature of the breast meat registers at 180 degrees.

8. Remove the chicken from the oven, and let rest for 10 minutes in the pan. After the chicken has cooled, remove to a cutting board and let rest for an additional 10 minutes before carving. Enjoy!


Love in a Mug

I am now able to add my love of crafting with my love of oils thanks to my husband.  Plus I can share it with you and other items.  You can check them all out at https://www.facebook.com/danasboutiquecreations

WHY WE NO LONGER USE CANDLES IN OUR HOME + ESSENTIAL OIL “CANDLE” BLENDS

Do you love candles? Yep. Me too. Well, let me correct that statement… I did. It’s undeniable – not only do they make a space smell amazing but as soon as one is lit, the coziness of the area is amplified. Even if it’s in the dead of summer! We’ve always had them around our home for those reasons until I started really digging into our health and what could possibly be impacting our fertility journey.** That lead me to start researching everything we bring into our home (because ultimately, we are the gatekeepers of our home) including you guessed it, candles.

With just some preliminary knowledge on “fragrance” and a “are candles toxic?” Google search, I had a general idea of information I’d gather from people desiring to live more on the side of non-toxic lifestyle. Eliminating candles in our home is a big deal for me though, you guys. I didn’t want to simply stop using them because someone made a claim that they are “bad for you”. No. I needed to read actual studies on why they’re bad and make my own decision and base my opinion off of research, not just assumption. 

So that’s what I did. I slipped back to my grad school habits and sifted through articles and journals of research. This time, however, it was not about foodborne pathogens, it was all about candles. I was on the hunt to determine if and why they should be something we consider replacing in our homes. Here are two main points from the information that I gathered:

  1. When scented candles are combusted, they have been shown to emit compounds such as various aldehydes (including formaldehyde), hydrocarbons and alcohols as well as various polycyclic aromatic hydrocarbons (PAHs) that have been identified as carcinogens (naphthalene, anthrancene, and pyrene to name a few) (1-7). Some of these compounds have also been identified as mutagenic, which is a material that can change the genetic material of an organism (8). 
  2. Candles are a source of particulate matter that contribute to indoor air pollution (1, 7-8). These small particulates are especially prevalent because of their alveolar deposition, high surface reactivity, chemical composition, and inflammogenic potential that could cause negative health effects (9). Some research indicates that people exposed to this type of emission experience a significantly increased risk of throat and upper respiratory tract infections (10-12).

I know I didn’t go into tremendous detail (you can read more from the references below if you wish!) but those two simple points were enough for us to make a change in our home. The thought of removing candles was a bit of an initial shock but considering we were able to replace them with something else, that shock wore off almost immediately and we do not miss them. Instead of burning candles, we create a “hygge” (a quality of coziness) environment by diffusing essential oils. Some added benefits of using essential oils in our diffusers are that it eliminates a potential fire hazard, they provide support for our emotions and immune system, and something that I was really shocked about… They’re more cost effective.

I will be the first to say that some Essential Oils can be pricy. At the beginning when we started using them, I was very skeptical. Without doing any math and with all health implications aside I thought, “There’s no way these oils are less expensive.” I was wrong. I put pencil to paper and started crunching all of the numbers against the candles that I would typically purchase from Bath & Body Works. A single bottle of essential oil may seem expensive, but I was failing to think of a few important things: I could use that one bottle to make dozens of blends and DIY recipes, a 15 ml bottle includes 255 drops!! and have I mentioned that essential oils can provide immune support and emotional support among many other things? Another thing I was skeptical about was the aroma they gave off. “Could a diffuser blend really smell like a Snickerdoodle or “Sweater Weather”?” I tested the blends to find out. YOU GUYS! They really do. The first time I put a “pumpkin spice french toast blend” in the diffuser I couldn’t wipe the smile off my face. It smelled like heaven! It’s also fun because you can follow a blend recipe (we have hundreds in our community that you’re joined into once you order a starter kit!) or customize your own and change it up whenever you want. If you want to burn the same blend like you’d burn for 30-45 hours with a candle, that’s perfectly fine too! 

Some things I want to note about this comparison:

  • To determine the cost per hour of burning a Bath & Body Works candle, I divided the total cost ($24.50) by the best case scenario burn time of 45 hours.
  • The cost noted for the essential oil blends applies to blends diffused in the Desert Mist diffuser (the most popular diffuser sold at Young Living and one that comes with the Starter Kit) on high for 5 hours. This price could be even less expensive if using the Aria diffuser that can run for up to 12 hours or using the intermittent or low settings on the Desert Mist.

Are we glad we made the switch from candles to diffusing essential oils? Yep. We sure are. Not only are we eliminating a potential source of carcinogens and mutagens and improving our indoor air quality but we are also being more cost effective which is also really important to us

 
Read Older Updates